So you want to develop a WordPress site, but you have no idea where to start? First things first, you need to set up your local development environment. It’s really simple, and here’s how you do that on a Mac.
First, download and install MAMP. This is your local web server where you will run your local WordPress site. It comes with everything you need, including PHP and MySQL, which are the backbones for WordPress.
Once MAMP is installed, launch it and start the servers. Once the servers are up an running, both green lights should be on, as shown in the image below.

Additionally, a web page will open up automatically. This page is where you manage your web server and create your databases as needed. To develop your WordPress site locally, you need to create a MySQL database, so that’s what you’ll do next.
To create your database, first click the phpMyAdmin tab. Inside that tab, click the Databases tab. Your screen should look like this:
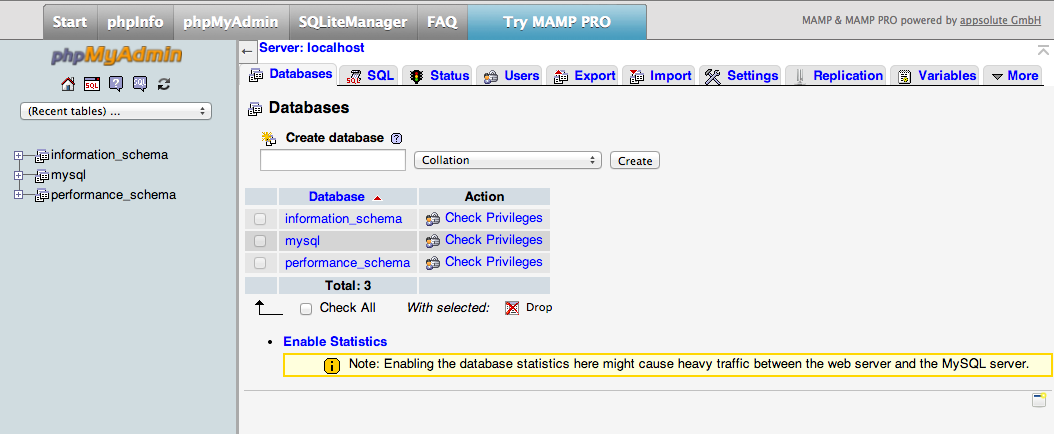
Enter the name of your new database and click Create. You should see your database listed below right away:

You can go ahead and close that window, for you won’t need it any more.
Next, in Finder, go to Applications > MAMP > htdocs:
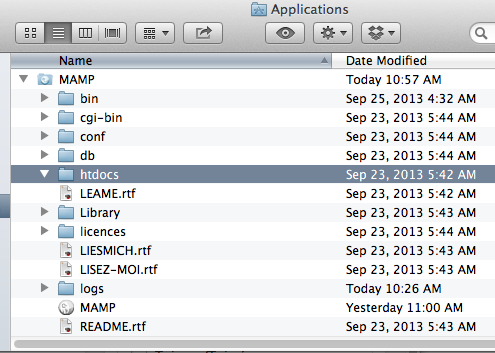
In htdocs, create a new folder with the name of your site.

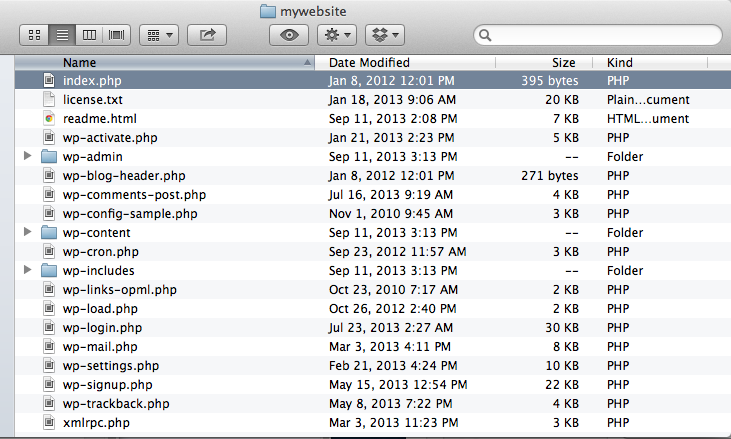
Next, download and decompress WordPress. Once decompressed, move the contents of the WordPress folder into the folder you just created in htdocs. Your folder should look like this:
Now, go to your web browser and type the following address in the address bar:
localhost:8888/mywebsite
where mywebsite will be the name of your site. Click through the first two steps of the WordPress setup wizard (there’s only one option in each step), until you get to this screen:

In the Database Name field, enter the name of the database you created earlier. For User Name and Password, enter anything you like. These are the user name and password that WordPress will use to manage the database. You probably won’t need these again during your development, but write them down just in case.
Leave the remaining two fields as is, and click Submit. Then, click Run Install in the following screen, which will bring you to this screen:

Enter your desired username and password and your email address, and click Install WordPress. These username and password are for the WordPress admin page, and should be different from the username and password entered in the previous step.
And that’s it! You can now start developing your site locally. To access the admin page, go to this address in your browser:
localhost:8888/mywebsite/wp-admin
To view and modify the code for your site, work with the code you copied in your new folder in htdocs. Be careful with this code, for most of it is not meant for you to edit unless you really know what you’re doing. Usually, you would develop a new WordPress theme for your site, which should be saved under mywebsite > wp-content > themes.